

Fun and Easy Summer Paper Plate Crafts for Kids
A cheap paper plate can turn into a crab, a seashell, a seahorse, or a turtle in one afternoon. If you want a summer craft that feels fun without needing special supplies I’ve got you covered! All of these crafts use paper plates and a few simple supplies.
These projects keep the setup easy and the finished crafts are super cute(if I don’t say so myself). Below you will find easy step by step directions as well as a video showing how its all done.
Getting started with paper plate crafts
This set of crafts begins with one of the easiest supplies to keep on hand, a paper plate. The best kind for these projects is the cheap, flimsy style you can grab at a dollar store. These are my favorite for paper plate crafts because they are easier to fold and cut plus cheap to get a bunch to have on hand.
You’ll also want a covered work surface before the paint comes out. Kids plus paint equals big messes. I like to use a plastic table cloth I can reuse a bunch. You can also use newspaper, silicone mats, or craft trays. Watercolors work for most of these projects, while the crab uses red tempura paint for bolder color. A basic watercolor set, including a simple one from Crayola, does the job well.
Tip: Tape the plate down before painting the rim if it keeps sliding. This makes it easier for little hands to cover the plate without getting paint on their hands(ok they might still get paint on their hands).
Four summer paper plate crafts to make
Each project uses the same base in a different way. One folds into a rocker, one opens like a shell, one becomes a cut-out animal, and one turns into a pop-up turtle shell.
For the video directions click below:

The rocking paper plate crab

Supplies:
Paper plate, red paper, red tempura or washable paint, googley eyes, white glue, and black marker.
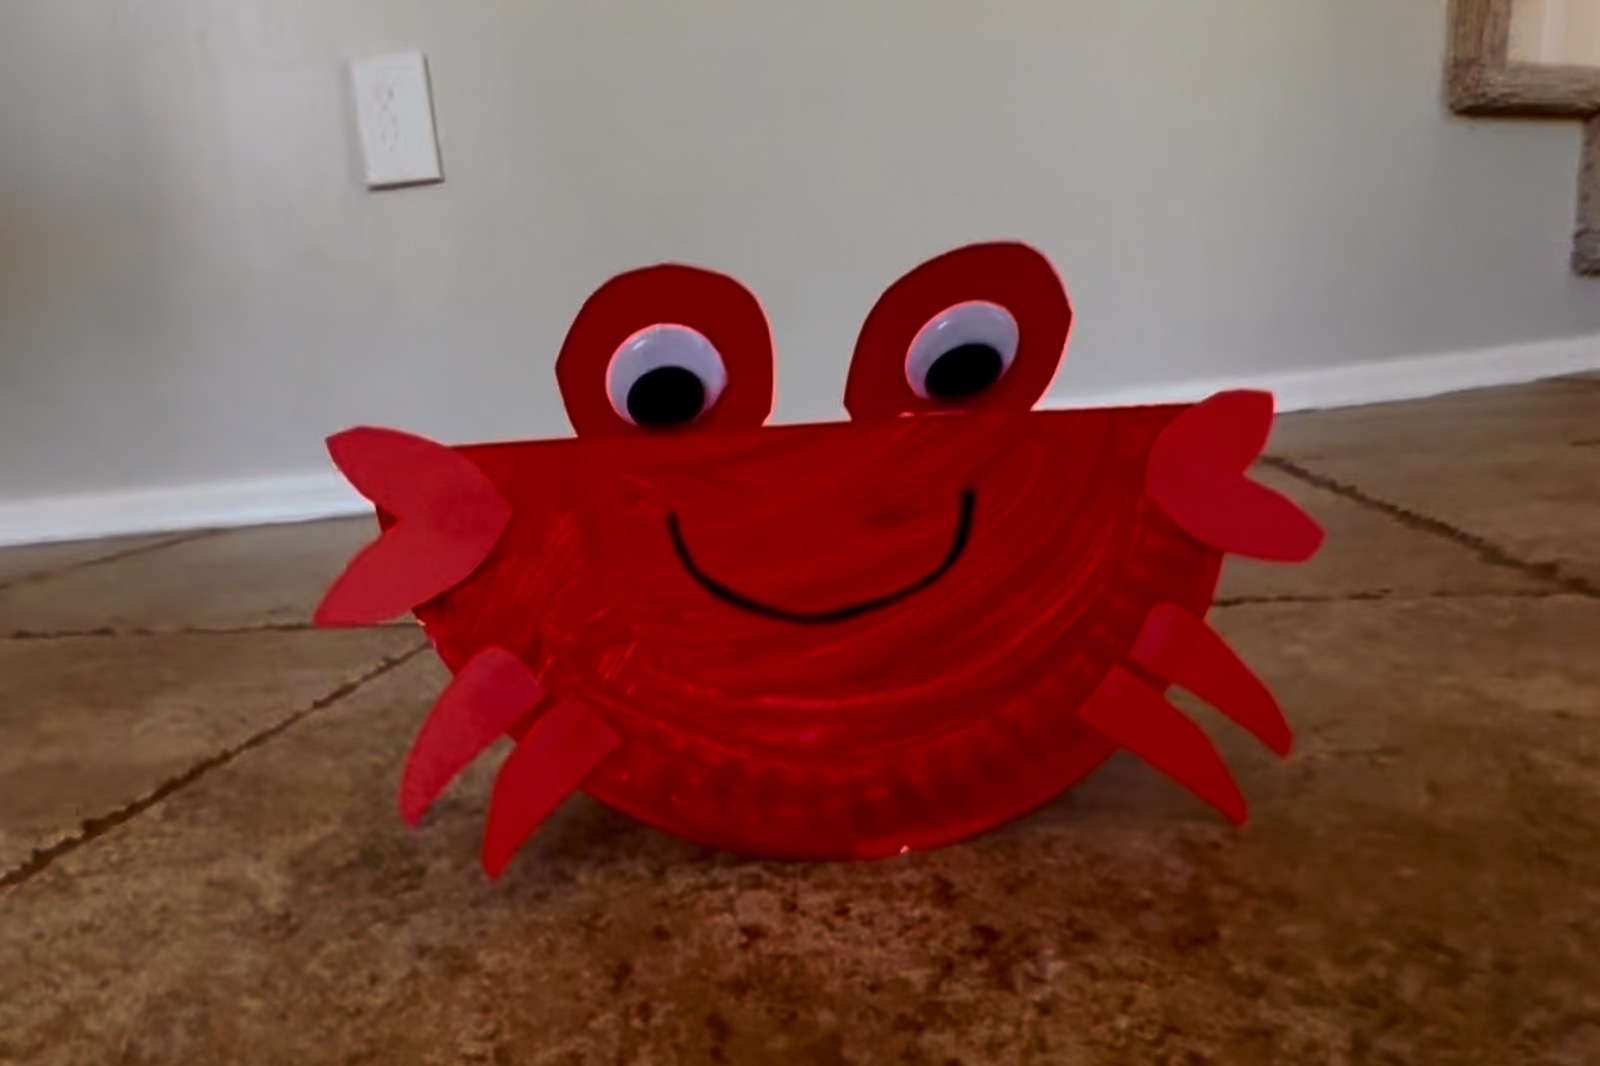
To start the crab gather a paper plate, red paint, red paper, googly eyes, white glue, and a black marker. If you don’t have googly eyes, you can draw eyes on white paper instead.
Start by squeezing red paint into the center of the paper plate. Spread it outward with a brush until the top is covered, then keep working the paint down toward the sides. The rim grooves matter here, because once they’re painted, the crab looks more finished. Since the plate can slide around while you’re brushing the edge, taping it to the table helps. Set the painted plate aside and let it dry completely before moving on.
After the paint dries, fold the plate in half and press the fold firmly. That crease turns the plate into a stand-up rocking base. This way the crab looks like it is walking around and makes the craft extra cute! Test it on the table and you’ll see the shape right away.
Next, use red paper for the details. Place a googly eye on the paper and draw a circle around it that is about twice the size of the eye. Then draw the claws and legs as simple curved shapes. Fold the red paper in half before cutting, and staple it if needed so the paper doesn’t shift. That gives you matching pieces, including four legs.
Glue the googly eyes onto the red circles with white glue and let them dry for a minute. If you don’t have googley eyes just draw eyes on white paper and glue them to the red paper. Then attach with glue or tape those finished eye pieces to the top back edge of the folded plate so they peek up above the crab’s body. Glue a claw on each side, then add two legs underneath each side. Once everything is attached, you have an adorable red little crab that rocks on the table instead of sitting flat.
The Watercolor Seashell Paper Plate Craft

This seashell has a softer look than the crab, and watercolor gives it that washed, beachy feel. For this one, gather a paper plate, watercolor paints, a cotton ball, markers or crayons, white glue, and optional glitter glue or small gems.
Wet the watercolor set with water, either by dipping your brush or lightly misting the paints first. Then paint across the plate, using whatever colors you like for the inside of the shell. I used a bunch of colors but you can stick to two or three colors for a simple look. Because the plate curves, some of the watery paint may slide toward the middle. If that happens, blot the extra moisture with a paper towel and brush more color around the edge until the surface is covered.
Once the plate is dry enough to handle, fold it in half. Draw a shell shape. I used a classic scalloped shell. Feel free to look up a picture of a shell or you can print out one of these shell craft templates. Cut out the shape of the shell and make sure to round the top edges for the shell shape.
The next step gives this project its pop-up look. Fold the top section upward where the shell shape starts to curve inward, then add a little glue so it holds that open position. After that, decorate the outside with simple patterns. Lines, circles, zigzags, and curved marks all work well. Markers, crayons, or oil pastels can all add that detail on top. This part is optional but it adds a little extra fun and design.
Another optional step is to add glitter glue inside the shell over the watercolor paint. Then add a cotton ball with glue in the center for a cute pearl in the shell.

Paper Plate Seahorse

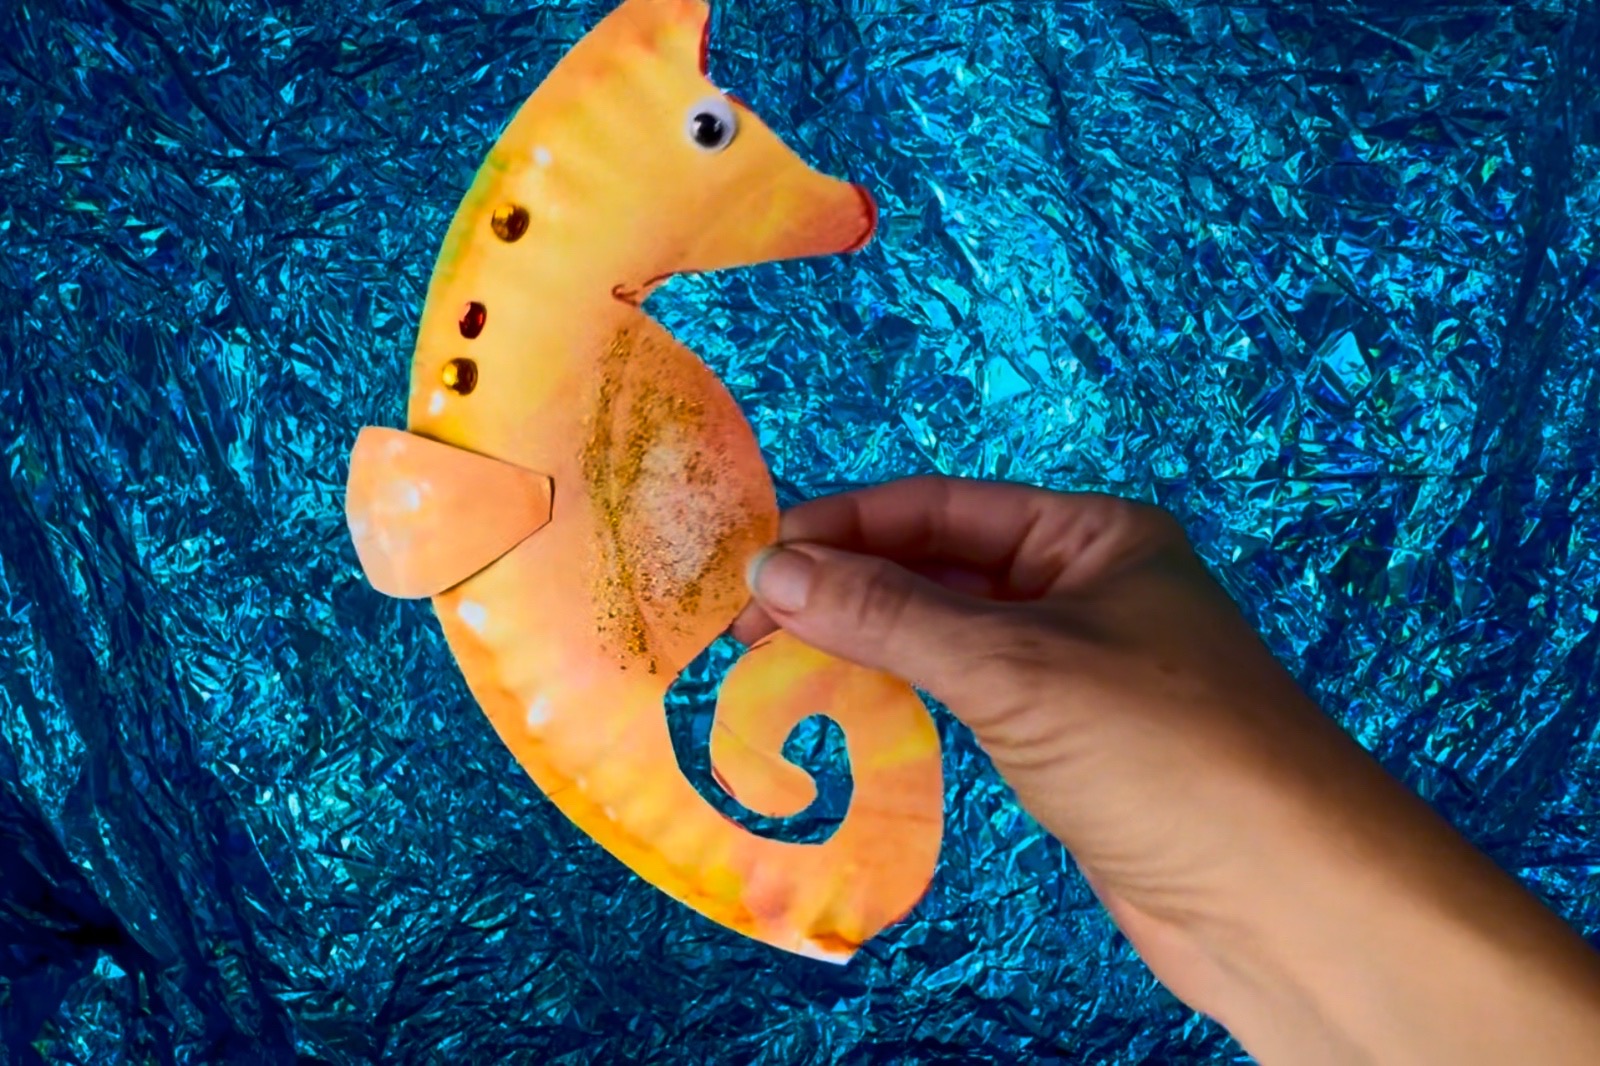
The seahorse uses the plate in a completely different way. Instead of folding it, you paint it, trace a shape on it, and cut the whole animal out. You’ll need a paper plate, watercolor paints, googly eyes, and white glue. Optional: add gem stickers or glitter glue for some sparkle.
Flip the plate over and paint the back, covering the full surface and the edges. I uses yellow and orange, which makes the seahorse look bright and sunny, but any color combination works. Give the plate time to dry before tracing anything onto it.
To make the shape, first trace the paper plate onto a piece of paper and turn that circle into a seahorse template. The outline starts with a small curved line for the face, then a short line for the nose, another line heading back toward the outside edge, a line downward, a curved belly, and a spiral tail. After the paper template is cut out, trace it onto the painted plate.
Once the shape is traced, cut it from the plate. Repeat on the other side for 2 sea horses. Use the remaining plate area for the separate fin piece, then glue the fin onto the body. Finish by adding a googly eye on the face. At that point the seahorse already looks complete, but you can also add a little glitter glue or a few gem stickers if you want it to shimmer a bit more.
Turtle Paper Plate Craft
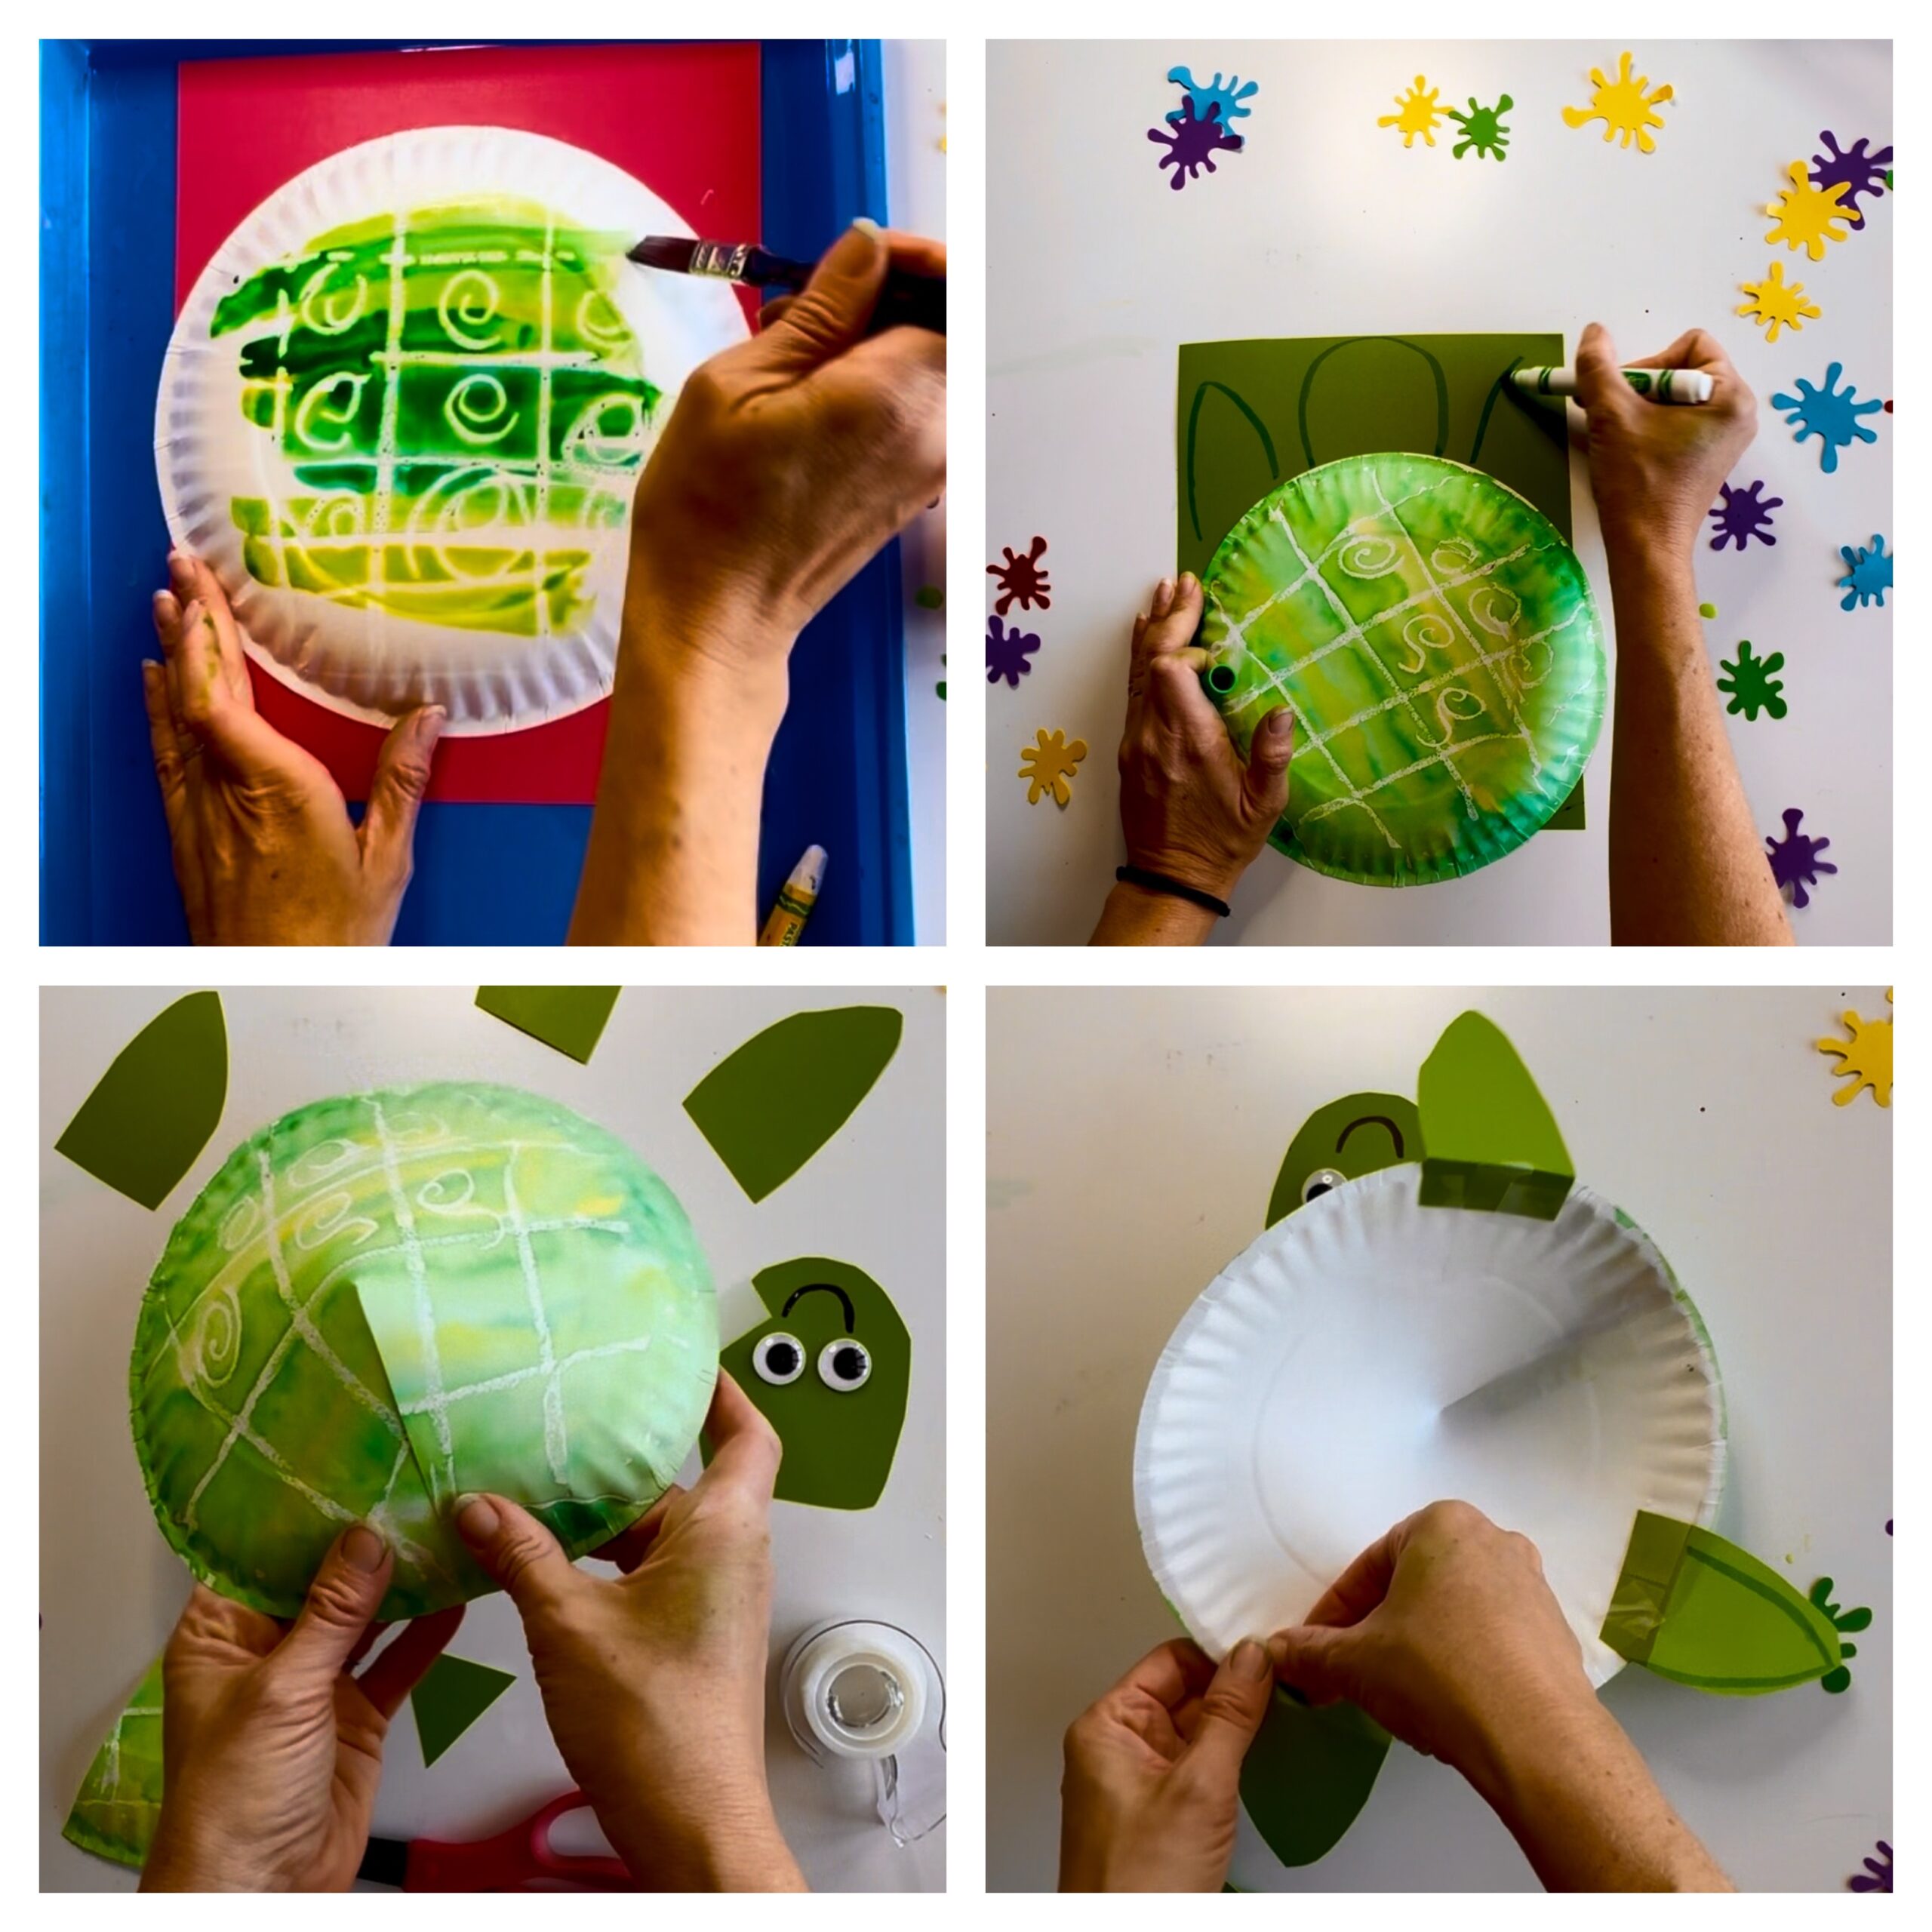
For this one, you’ll need a paper plate, a white crayon, watercolor paints, green paper, googly eyes, and a black marker.
What is great about the turtle paper plate craft is there is a hidden surprise with the design. It also pops up like a real turtle shell.
Begin on the back of the plate and draw with the white crayon. You can make simple lines, repeating shapes, or a mix of patterns across the shell area. I did a combination of both lines and swirly shapes just to show what you can do. Once you finish with the white crayon or white oil pastel it is time to paint. Green watercolor is the obvious choice for a turtle but you can use multiple shades of green. A blue turtle or a pink turtle would also look adorable and use the same technique. Brush the paint across the plate and watch the crayon-resist pattern come through as the color spreads.
After the shell dries its time to make this paper plate into a turtle! Cut a circular or oval shape for the head. For the legs and arms, cut leaf-like shapes with a pointed end. Then cut a small triangle for the tail. Add googly eyes to the head and draw a small smile with the black marker before attaching it to the shell.
To give the turtle some dimension, cut a triangle slit in the paper plate and make a second cut to remove a small triangle. Bring those edges together and tape them so the shell lifts upward instead of lying flat. Use as much tape as needed on the top and bottom to keep that shape in place. Then fold the legs over the underside of the shell and tape them in place. You may want a little tape on top too if the pieces shift. Add the head and tail, and the turtle is done. Thats it you are done! I love how cute this sea turtle paper plate turned out.

Final thoughts
These paper plate summer crafts are the perfect easy craft with kids. One stack of plates turns into a rocking crab, a watercolor seashell, a bright seahorse, and a pop-up turtle without much prep.
This month I am all about beachy under the sea fun and these paper plate crafts are perfect for summer/under the sea craft adventures. Make one or all of them!

About Valerie Jackson
Hi I'm Val! I love making simple crafts with my kids using free printable templates. Come craft with us!
- Web |
- More Posts(503)